Pages

Friday, July 6, 2018

Tinkergarten Review

Back in April, we did a free trial of a Tinkergarten class. I've been interested in taking the kids to one for awhile, but didn't want to go into Austin for it. When I saw there was a class in Bastrop, I jumped on it. The classes are nature based and allow kids the freedom to learn as they play using different sensory experiences. It was around an hour and the time flew by. It starts around 18mo and depending on the class, goes up to 8. Classes seem to range between 6-10 sessions and run around $20/class. There is a sibling discount that gives 30% off the additional kids.

When we arrived, we were given buckets and little tong things and told to go explore and find treasures. Wyatt loved carrying his little bucket around. 

Josh took Ethan and Emma up on the hill and into the trees to explore. Ethan showing off a shell he found. We've been to the park a bunch of times and had never even noticed shells before so it was fun to really look around on the ground and check out our surroundings. 


Emma adding treasures to her bucket. 


One of my favorite parts of the class was seeing the looks of wonder on their faces. They really loved finding different things in nature. 


After about 20min, we came back to the blanket and showed off our finds. Here's Emma sharing with our teacher for the day, Erin. She was so great with them!


We sang a song about nature and animals. 


Then dumped out our buckets to take inventory of what everyone found and talk about the different colors and textures.

The next step was making magic potions with our finds. The teacher brought some fresh herbs and spices to add more color, scent, and texture. The kids loved smelling all the different herbs. 

Wyatt mixing up his potion. 


Mimi helping Ethan with his. 


So many fun sensory moments during the class. 


Having everyone smell his potion. 


At the end, we picked a tree to water with the potion. 


The kids had so much fun running around and finding cool things. They have since asked to make potions at home so we've gathered flowers in the yard and various spices and made our own here. Overall, it was a super fun and interactive class for them. We didn't sign up at the time because the hours/days didn't work for us, but I'd be interested in doing it in the future if we can make the time slot and our budget allows. It is on the higher end for us, which is always a bit of an issue with 3 kids though.

Here's a link to the leader, Erin, that we had. https://www.tinkergarten.com/leaders/erin.holley I'm not seeing the Bastrop location on the site right now, but keep an eye out in case it opens up for Fall. 

Wyatt's Dinosaur Nursery

So...yeah...this post is super delayed. We finally finished Wyatt's room back in January after he was already a year. Whoops. Sorry 3rd child, a move definitely delayed your nursery completion. Some of the things we had purchased for his old room in Ga didn't quite fit in the new room so we had to move things around a bit. 

Anyway, on to the room. I couldn't find any dinosaur fabric I loved so I decided to do a mix of navy, bright green, and dark grey and accent with dinosaurs. My mom, as usual, made the amazing bedding. I love how the mix of colors and prints turned out. After I'd already purchased the fabric, I found the most amazing curtains that could not have been more perfect. I still can't believe I managed to find dinosaur curtains in the exact colors I'd chosen. Thank you Home Goods! They make such a fun statement in the room. 


View coming into the room. The wood dinosaurs on the right wall are from Hobby Lobby. I originally planned to paint the orange to match, but decided I liked the pop of orange. How perfect are those curtains though?! 


Wall to the left of the door. The LOVE canvas was made during our gender reveal. I taped off the letters and then we had squirt guns filled with paint to squirt at it to reveal the gender. So fun! Dino heads and lamp are from Target. I added blue ribbon trim to the lamp shade because it was a bit too boring for me. Wall decor and little dinos are a mix of Target, Home Goods, and Hobby Lobby. 


My mom made another set of slipcovers for the glider and the accent pillows in the room. The green table was originally pink in Emma's nursery and we just spray painted it.


My mom made the changing table cover and the diaper holder. I snagged the dino frame in the Target clearance aisle and we made the other dino hangings. 


I got the decal from Wall Decal World. It was only 1 color online and no name, but they were really great to work with on customizing it for me. I think it was only around $10 more to add the name and change it to 3 colors. This sweet boy has the biggest hugs so it ended up being perfect for him. 


I planned to make a dino head coat rack, but there wasn't room in this house. So we settled for 2  hooks. But then they looked so cool once we finished them that I didn't want to cover them with anything hanging. I love them!


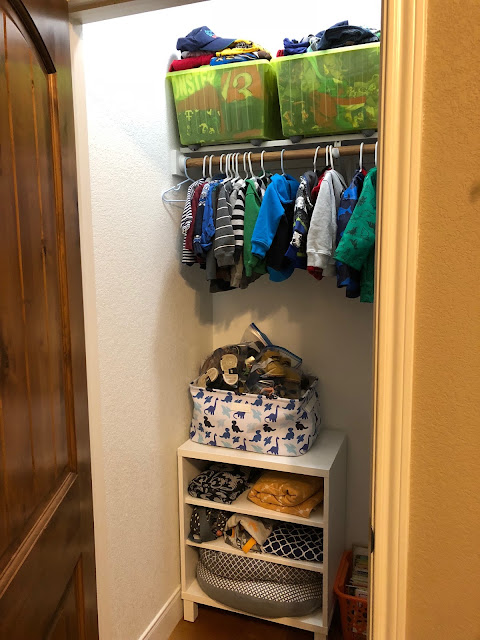
Closet storage. Top bins are from Ikea and hold his next 2 sizes. He has a ton of hand me downs from Ethan. The bin on the shelf holds Ethan's old shoes labeled by size. The shelf holds a couple of wraps/carries, extra bedding, and boppies. 


Hats and shoes. Ridiculous amount from Ethan and garage sale finds. 


This is probably my favorite thing in the whole room. It turned out exactly how I wanted. Josh did such a good job on this and the hooks. 


Closeup of the shelf decor. His little hat from his birthday was perfect. 


The adorable quilt my mom made. She made the dinosaurs to match the dinos in the curtains. Nana quilts are the best!


How adorable is the mobile she made?! Again, she made the dinos to match the style of dinos in the curtains. I LOVE this so much.

And that's it! Nurseries are by far my favorite rooms. They're so much fun and I love each theme our kiddos had. He loves pointing at all the dinosaurs hanging around. The furniture was almost all re-used from the other kiddos so we didn't spend too much on this room. 


Friday, April 13, 2018

RC’s Playhouse review

RC’s playhouse review for local friends. 

We decided to check out RC’s on Friday since it was half off during their soft opening. We met up with new friends so the kids could all play together. They ended up playing amazingly well for over 3 hours! There were almost no fights and the ones that happened were resolved quickly and easily. That’s like unheard of with a bunch of kids under 5 in a new place. 😳 

Pros

Location. It’s maybe 5min away from us so super easy to get to. We’re on the outskirts so it will be closer to 10-15min for those in town or towards cedar creek. 

Indoor. While we LOVE being outside, it’s nice to have an option for rainy days. It’s also going to be too hot to play outside before we know it and this will be perfect for that. We have memberships to the zoo and dinosaur park, but won’t be able to use those much during the summer. 


Variety. There’s a infant/young toddler area. There’s a smaller space for younger kids or less adventurous kiddos who want to play without going through the large tunnels. There’s a huge structure with different areas to start and end. The zip line was a huge hit. Then there’s more of a quiet area. Table and chairs with puzzles and building toys (magnatiles I think). The older kiddos rotated nicely between all the areas taking breaks to build together after chasing each other around


Relaxation: yes...you read that right. I got to sit and mostly relax! This is a great place to take your kids and be able to chat with other mamas. We almost didn’t know what to do with ourselves. We had to occasionally help a kid or tell them to stop something, but for the most part, we did nothing. Amazing right?! I even showed off a quick Color Street application. Lol

*Update* We went back again for their grand opening since it was free. I, again, got to relax with another mom! I even was able to do my nails while they played. So nice! I did the kiddo's nails too. How cute are our matching mermaid print nails?! And my friend has on Broadway Glimmer. (Join my FB page Crystal's Cute-icles for more info on our adorable nails)


WiFi: if you need to get some work done while the kids play, this is the place to do it! Bring your laptop and let the kids go wild. 

Snacks:  I like that we can bring our own snacks (and we even joked about pizza delivery). There’s also  some small snacks available for purchase. 

Tired kids: Emma took a nap for once! That almost never happens. All the kids slept in a bit the next day. 

Cons:

Size. While they do a great job of making the most out of their space, it’s on the smaller end of all the play spaces we’ve been to over the years. Not bad when there’s only a couple families, but if they’re busy, I think it will feel really crowded quickly. 

Seating: this is mostly due to space. Not a ton of seating for grown ups. Again, fine when slow, but when busy, people will be sitting on the floor. Which really doesn't bother me much, but some might not be fans. If I remember right, there's 2 small tables with chairs, a couch, and a loveseat?

Price. This is the biggest con for us. It’s $9/child. Times that by 3 kids and we’re at $27 a visit. They do have monthly and annual memberships, but even at their reduced grand opening prices, they’re still really high. $75/month for family of 3 or $450/year for family of 3. Even with $100 off of the annual membership this month, it’s a huge investment. This price point won’t be feasible for many families, especially those with single income households. 

Compared to the many similar facilities we’ve been to in the last 5 years, across multiple states, the cost was shocking. For the space and location, I’d expect closer to $5/child. For comparison, here are some membership prices for other Austin area places we’ve gone or plan to go. Pricing will be based on my family cost (me and 3 kids since Josh is usually working when we do activities) to keep it even. 

RC’s playhouse: $450/yr. $350/yr if purchased on April

Dinosaur Park: $75/year. Wyatt is still free here otherwise it would be $100/yr

Capital of Texas zoo: $99/yr 

Thinkery: $99/yr

McKenna Children’s Museum: $150/yr 

Mt Playmore: doesn’t appear to have annual price. Looks to be $45/mo for 3 kids so? This one is more expensive, but it’s also much larger. This is also the most similar concept to RC's.

*Update* I just saw they lowered their pricing for 12-23mo to $5/child. So, that puts us at $23/child per visit. I'm assuming membership pricing is the same since it wasn't mentioned. 


Final thoughts: Overall, this place is a great addition to the area. For as many families as we have out here with small kids, there are not many places to play indoors. Anything that can keep my 3 happily playing for close to 4 hours wins a prize in my book. I’m still in shock that they played so good for so long. Unfortunately, I’m not sure we can find room in our budget for more than the occasional trip and even that will be hard to justify. If it were closer to $150-$200/yr I think it would be more manageable for families. The owners and staff are all super friendly and great with the kids. 

My kids are still talking about it and want to go back so that’s always a good sign. Ethan said he wanted to stay FOR.EV.ER, asks nonstop for a membership, and said he wants to go everyday, twice a day. Lol Every time we leave the house they ask if we're going to the fun play place. 

Here's a few pics I snapped while they played. Look at those big smiles!


Tuesday, April 26, 2016

Play Makeup for Toddlers

For the past 4 months, I have slowly KonMari-ing my belongings. Which means I have a lot of excess I'm getting rid of. While doing my makeup, I thought of how wasteful it was to just throw it all away. That's when I remembered that I pinned this cute idea about a year ago. My toddler loves to get into everyone's makeup bag and pull out everything while making a huge mess. So, I decided to make her a makeup bag of her own.

I have a ridiculous amount of cute makeup bags courtesy of an old IPSY subscription. I also had a few makeup brushes from samples that didn't work for me. Everything used was something I already had and planned to discard.

First, I took a few old eyeshadows out of my discard pile. I used a nail file to scrape out the shadow and used a makeup remover cloth to get any small bits left.


Then, I picked some colors from my nail polish discard pile. I ended up swapping the bright pink for 2 others since I couldn't get the cap off. 


Then, simply pour the nail polish into the empty pots. For some I used 2 colors mixed to get the color I wanted. I left them open in front of a fan on low overnight to dry. They take awhile to dry since it's a thick coat of polish. She ended up with a foundation, blush, sparkly lipgloss, and 2 eyeshadows.

I gave it to her this morning and she LOVED it. She immediately asked for me to open them and went to putting on her makeup. She sees me, her aunts, and her Mimi put it on all the time so she loved getting to feel like one of the girls.


She ended up playing with them almost all day and night. Everyone that was near her got a makeover. Puppies, stuffed animals, and big brother included. 


So if you have any old makeup products, this is a super quick, easy, and free project to throw together. It only took me about 10 min to do (minus dry time) and has already provided hours of fun for my sweet girl. 

Saturday, April 25, 2015

Sweetest big brother

Sometimes Ethan is so adorable that I just can't handle it. Last night, he asked to sleep in his chair instead of the crib. We decided to give it a go and put the gate up at he stairway. Well, this morning I woke up to some sweet brotherly love.

Emma must have woke him up crying. He went running into her room and I heard him saying "hiii Emma" through the monitor. He started talking to her and trying to comfort her (most likely putting his hand through the slats and patting her on the head like he does).

She started crying harder and I was making my way upstairs when I hear him run to the gate and yell down to us. "HEY! HEY! Baby crying!" Hahaha. Then when he sees me, he runs back to Emma and says, "it's ok baby" "it's ok sweetheart" like he hears me say to her.

Seriously the cutest. Sure, he's the toddler brother who hurts her sometimes (usually on accident since he's so not gentle), but he's also a total sweetheart who adores his baby sister. He loves to protect her and snuggle with her. 

Here my little cowboy pushing her and having to pause to kiss the top of her little head. <3 *swoon* 

Thursday, March 26, 2015

Pee Wee Rebuild Part 1

Middle of the day texts from Josh are often very random. One day I got a text with a Craigslist link asking “Can I buy these for Ethan”. It’s a link to 2 dirt bikes. Ethan just turned 2, no idea why he needs even 1 dirt bike, let alone 2. But, they were a great price and I figured they’ll take some time to even be running so why not let them have some fun working in the garage. Josh thought it would be fun to track their progress, so here's part 1.

Week 1

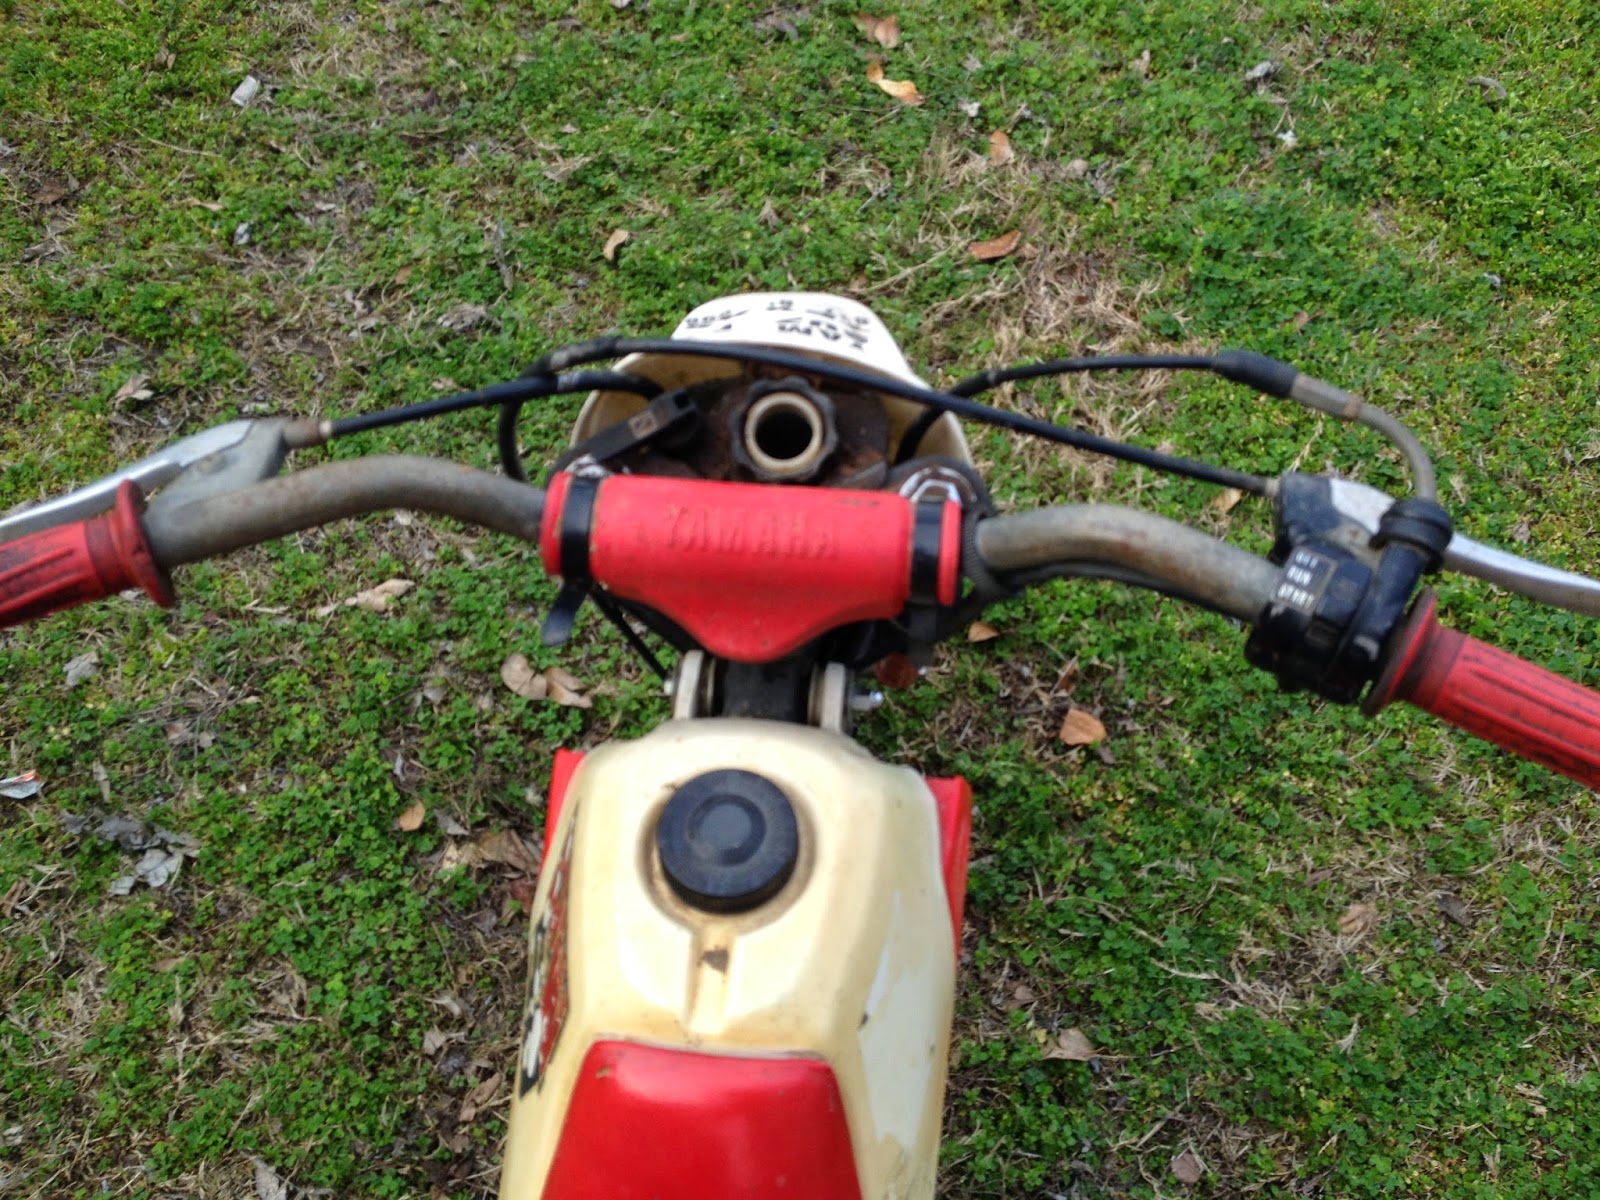
So, Josh and Ethan went out that night and picked up two Yamaha PW50 dirtbikes.  These are the smallest dirt bikes made, and are known as “PeeWees”.  The bikes don’t run, but are mostly complete at least, and were advertised as needing minor things such as a carb rebuild.  Ethan hopped on one immediately while Josh was talking to the seller and wouldn’t get off them as they were being loaded on the truck.  He “vrooomed” the entire time for onlookers as Josh tied them down. It’s like he knew they were for him. This kid is obsessed with anything on wheels.
Doesn't he look like a little natural up there?
So excited!

Over the next few days, the bikes were cleaned and examined.  A power washer was borrowed (and later broke-oh the joys of working in the garage), fuel tanks drained and cleaned, carbs cleaned, etc.  One bike is going to be the “parts bike” and the other bike is going to be rebuilt.  The question was which one?  Before any more time was dumped into trying to get them to run, Josh did a compression test on both of them.  This determines if the inside of the motor has enough pressure to run.  (Or something??)


Red bike pre-cleaning 


Yellow bike pre-cleaning


Ethan trying to put the fender back on. 

Ethan pointing out all the spots that were missed cleaning. 

Red bike cleaned and stripped of bodywork.

Online the lowest seen for a running engine was 80 psi, the minimum is supposed to be 100 psi.  This is what ours got:

Yellow Bike: 65 PSI
Red Bike: 30 PSI

The engines need a new top end or a complete rebuild.  Normally, this would be extremely expensive, but for little bikes it’s fairly cheap.  A new top end was ordered instead of rebuilding the original.  It was half the cost, had decent reviews, and a warranty to boot. 

The bikes VINs were ran: The yellow bike is a 1982 and the red bike is a 1987.  That’s roughly thirty years for each, with 2-8 year olds thrashing the crap out of them.

Week 2:

The red bike was selected for rebuild.  Even though the compression was lower, every other aspect was better.  The forks weren’t seized, wiring harness and switches were intact, and since the top half of the engine was being replaced, compression tests didn’t matter. 

Disassembly began. 

Ethan wasn't happy about disassembling it.


 He kept wanting to put it back together. 

Bike frame

Engine pulled from frame

Pictures of the inside of worn out motor


The engine, rear wheel, and other components were removed from the frame.  This was supposed to take an evening, but a lot of fasteners were seized up.  After two evenings it’s about halfway done.  This will continue throughout the week.  I swear any time Josh gives a time frame for something, I should expect at least double ;)

That’s the progress so far. Next on the agenda:

Finish disassembling everything.  Figure out the paint scheme for the bike.  Then take frame, exhaust, bars, wheels, and other small parts to powder-coater.  As it sits, it looks more like a tetanus delivery machine than a dirt bike.  Any parts that can’t be powder-coated (nothing with bushings/seals since the parts go into an oven), will have to be sanded down and spray painted at home.  
 
Images by Freepik