Pages

Wednesday, February 13, 2013

Robot lamps!

While finishing up the nursery for our, super soon to arrive, baby boy, we thought we'd like some lamps for when we don't want it so bright in there. Since our theme is somewhat unique (robots) and the colors aren't the norm for a nursery (brights instead of pastels), it's made finding reasonably priced/cute items difficult. I did find an extremely cute lamp at Target that has robots. How adorable is this?!?! But while I love it, the colors are a little too light to really work. AND, well, it's $65 for ONE lamp! No way could I justify spending that much money on a lamp, no matter how cute!
 So, while shopping at Big Lots for storage, I found some square shaped lamps that were simple and only $15 with a nice silver base which would go great with the grey/white. Problem?? They had PINK shades. :(
 But, since they were only $15 and I liked the shape/base, I figured I could maybe do something to them. The fact that they were square meant it would be super easy to cover. So off to Joanns to look for fabric. I didn't want to do the same fabric as the rest of the room since I was worried it would be too much. So when I found this really cute robot head fabric that has many of the same colors as the bedding, I snatched it up!
 Then grabbed some fabric mod podge to adhere it. I love mod podge for paper so hoped it would be just as great for fabric. I used my 40% off on it
.
 Grabbed the hubby when I got home to have him help out since an extra 2 hands were nice to have to make sure we got a smooth application and were able to pull the fabric tight enough. We applied a thin layer of mod podge one side at a time, smoothing it out and then using clothespins to hold the ends in place until it dried.
 We let it sit for 2 hours based on the mod podge directions. Then we got to work on the tops. I cut a slit down the middle of each inside seam to fit around the lamp and then cut into each corner to make it easy to square off and lay flat. Then same thing...mod podge and clothespins.
 We let that sit overnight and did the bottom half the next day. Then took off all the clothespins, popped them back on to the base, and sat back to enjoy how cute they turned out!
 LOVE them! For less than $45 in supplies we were able to get TWO custom lamps with adorable fabric that coordinates with our nursery bedding. The mod podge worked great. I'm so glad I didn't settle with ones that were more expensive or too plain.

Tuesday, October 16, 2012

The Minchkin

As many of you know, we're expecting our first baby in March. If you don't know, here's our announcement. :D I love how it turned out, but realized I never posted it on my blog. Probably because I never really remember that I have a blog. (Worst blogger ever award goes to me for sure)


This Friday, we get to find out what we're having. My friend has the results and is planning a mini reveal for when Josh gets into town. His parents will be visiting too so we can all find out together.

Josh said I should put together a little poll and I was just going to do it on FB, but then realized that it'd be harder to go back to and find later.

So, to help you in your guess, I found this picture on Pinterest and will answer them all:


1. The baby's heartbeat has been between 150-160 each time.
2. I've been craving sweets. Fruit roll ups especially.
3. Wouldn't really call it morning sickness, more nighttime, but yeah definitely been sick.
4. haha Well, as Josh said, the moodiness isn't pregnancy related and just normal. Thanks dear. Definitely been more emotional though!
4. My skin is usually pretty dry so hard to say. I use lotion all the time and that hasn't really changed.
5. I sleep on my right side, but when I'm lounging around, I'm on my left side.
6. Yes more headaches. But that could also be from lack of caffeine since I cut back so much and from stress.

And while it's not on the list, the few dreams I've had where I could tell a gender, it was a boy. We were also bored one day and tried like 10 different Chinese calendar sites. About 8 out of 10 said girl.

Soo....make your guess!! And come back this weekend to see if you were right! We'll definitely be happy either way and we plan to have more than 1 baby eventually so hopefully we'll end up with one of each at some point. lol We're the last chance to keep the Mincher name going so there's the pressure for a boy. But I'm totally girly so people totally see me having a girl.

What Gender do you think the baby will be?

How many pairs of shoes do you think the baby will have before it's even born?


And feel free to add baby name suggestions in the comments! Give us some ideas! I couldn't get that part of the poll to work right.

Thursday, July 12, 2012

Dream Closet

I finally got around to posting pics of my closet. It's still a work in progress, but it's most of the way done. This was my Bday/Christmas/Anniversary/etc gift from my awesome hubby. We bought all of the shelving and wardrobes from Ikea because they have great options for customizing your space.

 Here's the view walking in. I originally wanted to do it all in black and pink, but my mom and husband thought blue would look better on the walls. So, I went with pink, blue, purple as my color scheme.
 
To the left when you walk in, the room has a long closet that goes along the whole wall. I decided to use that space for my shoe collection. I need to do some rearranging still since I have more colored shoes than neutrals, but I'll worry about that later. I used the Besta bookcases in 2 different sizes so that I'd get the best fit. I keep one shoe behind the other since the shelves are deep enough to give me more space. I love the Besta line since you can buy more shelves to get the perfect spacing.
This is my fave shelf. It includes my Iron Fist shoes. They are definitely my favorite brand. I feel like I'm wearing art when I wear them. There's a few that aren't over in the closet yet, so I may need to expand to more shelves for them.
Here's the start of my neutrals. I don't have as many as I thought though so I think I'm going to try to condense them into 2 shelves so I have more room for the rest.
The top shelf is my booties, then it goes to heels/platforms, then to wedges, and then flats at the bottom on each shelving unit.
My husband took a scrap piece of wood, sprayed it pink, and added some hooks for hanging some of my longer necklaces.
I got this ottoman set from Target on sale during Black Friday. It has storage inside for my tennis shoes. It also came with 2 smaller ottomans that I keep by the island. The throw pillows are all from Ross.
View from seating area. The chandelier is from Overstock.com. The island was made by putting 2 of the small Expedit units on their side and topping it with a glass table top (also from Ikea but can't remember the name of it)
Another ottoman we used to have in our living room and more pillows.
My awesome shoe calendar.
Marilyn pic I bought years ago at Ross.
When I originally saw this table top at Ikea, it was on a white table so when I bought it I realized it wouldn't show the glass design at all. I went to Joann's and just bought some pink fabric to go under it.
I keep most of my jewelry on the top of that in pretty colored glass bowls. I got them from Ross, Ikea, and one from an antique store. The metal jewelry holders were from abcdistributing.com I think.
More bracelets and earrings.
I need to work on the shelving in the island still. Totally unorganized, dusty, and messy. lol
Yeah, messy on both sides :( Work in progress.
I saw this idea on Pinterest forever ago and had to use it. I bought cheap shower curtain hooks for hanging my purses. They were about $2 for 12 from Walmart. I used the 1/2 size ones for the smaller purses.
And then the full circle ones for my larger bags. I love how organized it keeps them. Only problem is, they aren't all over here yet so no idea where I'll put the rest.
We added some drawers for smaller things like winter gear, sandals, purses that I can't hang, etc
I put mirrored doors on each end. It makes the room seem bigger and it hides some of the hanging stuff. The corner area is for my dresses, then sweatshirts are to the left on top, and skirts on bottom. There's also a pull out rack for scarves/belts. My boots are in the bottom space under my dresses since I ran out of room. lol
The wardrobe is all from the Pax collection. Top corner is my dressier/nicer tops on top, and cardigans/sweaters on bottom, then to the right: tshirts on top, skirts on bottom.
View from the clothing area.
Added another mirror in the middle since I found this on sale on Groupon deals. They also have them on Overstock and Amazon for a bit more. Perfect for more jewelry.

So that's it so far! I need to play around a bit more with my shoe layout since they aren't all moved over yet and I'm out of room. Need to go through and sell some I suppose. Also need to work on the storage areas in the island. Those are a mess right now. No idea what I'll use the shelves above and below the hanging for yet, but they made the space seem more complete once I added them. I love this room and just like to go sit it in sometimes. lol I never thought I'd actually get a closet room even though I've always dreamed about it.

Wednesday, December 7, 2011

Stampin Up Demo Christmas Party

My Stampin Up upline demo threw her Christmas party for all of us in her downline. We got to hang out, do a make and take, did a card swap, and participated in a homemade white elephant exchange. For the exchange, the item had to use mostly Stampin Up products.

Since my craft room is mostly boxed up at the moment, (see post about my closet) I was somewhat limited on what all I could make since there was only so much I could actually FIND and get to. :) Thanks to Pinterest, I saw an idea about making bookmarks out of ribbon. Since my Stampin Up ribbon is in a big box, I grabbed out the first ones I saw and got to work.
These we super easy to make so I made a bunch of them. Great gifts or gift toppers for the readers you know. I did a mix of sizes depending on how big the pendant I used.
  
I love the polka dot ribbon. Anything with polka dots makes me smile. The crosses, butterfly, and clear flower were pendants I've had in my jewelry box forever. I've either lost the chains or use them for other pendants so I figured I'd give them new life.
The velvet ribbon is from a package that was on the SU clearance rack for awhile. I bought the pack for the ruffled ribbon, but never found a use for the velvet until now. The love, #1 mom, shoe, and purse were all part of a charm bracelet I bought for like $8 so I took them all off to use for multiple gifts instead. There's still more charms on the bracelet which means more bookmarks in the future :)
These were so easy to make. A few jump rings, some jewelry pliers, and the ribbon clamps are the only extra things you need. It's a great way to reuse jewelry that's no longer your style or that pair of earrings where you lost the mate.
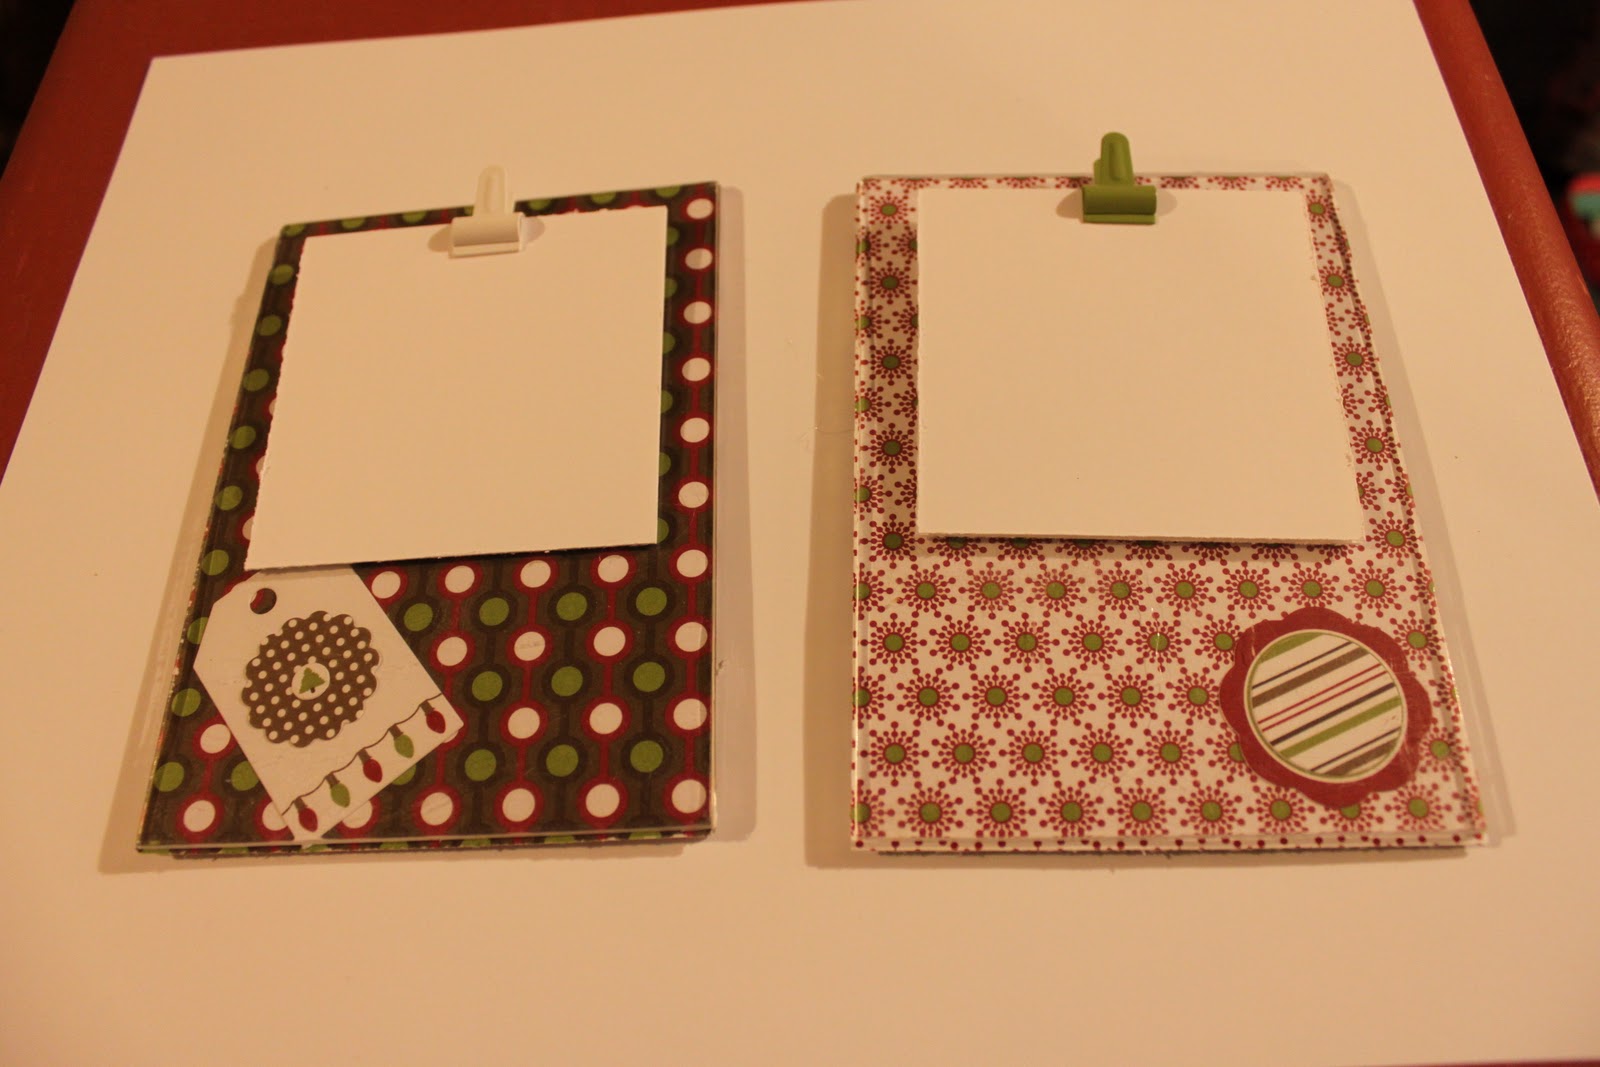
I've had these magnetic picture frames forever so finally put them to use. I put some stickers from the Simply Scrappin kit on some coordinating paper and slid them into the frames. They are reversible so 2 patterns per frame.
I hot glued on the mini clips from SU. I think I got these from the clearance rack too? Then clipped in some Whisper White cardstock for memos. These are super easy to switch out for different seasons and since they are magnetic, they are really handy. 
Instead of buying gift bags or trying to wrap the items, I decided to re-purpose some more of my JewelMint boxes. I have 100's of these lying around my house and they are too nice to just toss. I made a post before where I covered some, but I'm also using them for Christmas gifts.

 They have a magnetic closure and are the perfect size for little gifts.
Since my gifts for the white elephant were pretty simple, I made them for my demo as well. 
Bonus on the JewelMint boxes: they are the PERFECT size for my cards. So I decided to put my cards for the swap in one too since I would need a way to bring my new cards home. 
Now I just need to cover a ton more to "wrap" other packages for family/friends. The boxes are so sturdy that they can easily be reused or they can be used for decor to hold small items during the holidays.

For the card swap, I stuck to the Simply Scrappin kit since it was what I could find. I also used the Jolly Bingo Bits stamp set.
They were all slightly different because I used all the bingo stamps. The rickrack was from the same ribbon set as the velvet from SU and the twine was from my recent SU order. 
Considering I had limited resources with my craft room a mess, I think I turned out pretty good gifts/cards. I only used 1 Simply Scrappin kit for all 16 cards, the card boxes, and the frames and I still have some left over! The only other paper I added was Whisper White card stock. So those SS kits really are a great deal even if you aren't using them for scrapbooking!

If you are wanting to buy any of the Stampin Up products, please shop my website: http://www.stampinup.net/esuite/home/crystalmincher/ or contact me! And if you are interested in signing up for a demo, let me know. I don't do workshops like some do, I just enjoy the discount and it's worth it! I love it.

Where have I been?

Yep, I've been busy. I have been a super bad blogger and haven't posted in MONTHS! I was crazy with school and after some set backs, I'm taking online classes this semester. My husband also came home on leave which is always fun, but also always hectic! We only had 2 weeks this time so it was the shortest leave yet. We spent most of our time doing house stuff since as anyone who owns a home knows, it's never really finished. lol

In about March, I had pretty much all the rooms most of the way done. They were organized, things puts away, etc. Just needed some accent walls painted and some extra decorations on the wall. Well, then the hubby decided to give me the greatest gift EVER. It's like my Christmas, Birthday, Anniversary, etc gift for the next year or 2. He gave me a room turned into a closet!!! One of the only things I didn't like about our house is the small master closet. It's not really THAT small, but compared to my old closet, it's tiny. So I told him if I got my own room for a closet, he could turn our closet into a gun space. I never thought he'd actually go for it though. So, now I'm in the process of completely moving 3 rooms full of stuff around. By myself. While taking classes. And around the holidays. haha So, very little has been finished so far.

Of course the rooms I'm moving are some of the hardest rooms because of all the STUFF. The craft room is going to take the longest because everything is so small. And as I move my closet, I'm going through and getting rid of clothes and switching everything over to matching pink hangers. It all looks more pretty that way. lol

 Almost all the building is now finished in the closet. I have a few shelves and bars to still hang. Most of the delay is because Ikea's stock is terrible. I've had to make so many trips for out of stock items. I'm also having the hardest time finding seating for that room. I really really want pink chairs/chaise but the few I've found are way out of my budget. I *might* attempt reupholstering so I can pick my fabric. We'll see how that goes.

Here's a sneak peak of my dream closet. This was just the beginning with only 1 wall done. I wanted pink walls, but hubby and my mom convinced me that blue would look better so I'm accenting with pinks and purples.

Final pics will prob be up after the holidays. Not sure I'll finish before then.

Nurse thank you card and cake toppers

For our clinical group for nursing school, we had a fab teacher and hospital to help at. So, we wanted to show our appreciation. For our instructor, we took a group pic and framed it. I bought a plain frame from Michael's and decorated it.

I made the scrubs for the paper doll nurse to match our school uniforms.
Card to match
Since it was such a large staff, we brought them some baked goods so I made these toppers to put on them. Just taped them to toothpicks and I was good to go. I made a bunch of them, but these were all the different patterns. Super easy.
I was so busy the weeks coming up to that day that I made all these the night before so they were definitely simpler than I had planned.

Baby shower decor to wall art

Since I've been a terrible blogger, I have a bunch of posts that I haven't made in forever. One of them is this pic from a few months ago. I posted about the baby shower me and another friend hosted. We made really cute 12 x 12 hangings for decor. I LOVE that the mom framed them and used them for decor in the baby's nursery.
It's also a super inexpensive way to decorate. Baby stuff can get pricey. Cute paper + frames=great deal!
 
Images by Freepik